Guides / Workforce

Roster and shifts, step by step

Plan who works where and when. Set the standing site and shift for everyone, change them for specific dates, put people on projects, or upload a whole roster. Each step shows the exact button to click.

Want the full chapter? Solution Guide, chapter 4: Workforce (PDF) · All documentation

Set everyone's standing site and shift

Do this once for the team. Open app.bpmsquare.com/wfm/roster.

1

Open Standing site & shift

Roster has four tabs. This one holds everyone's default site and shift.
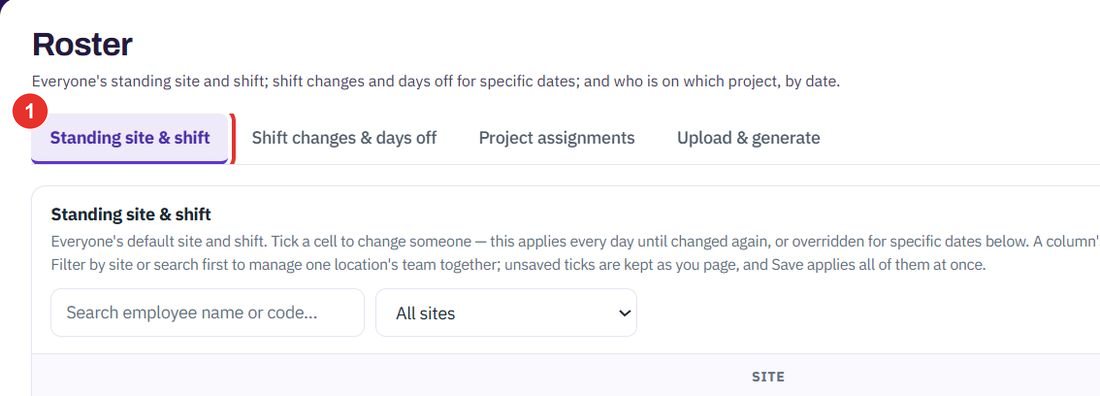
The Roster page with the Standing site and shift tab outlined and numbered 1
The first tab is open by default.
2

Narrow the list

Search by name or code, or choose a site in the All sites list. Assign all works on everyone currently filtered.
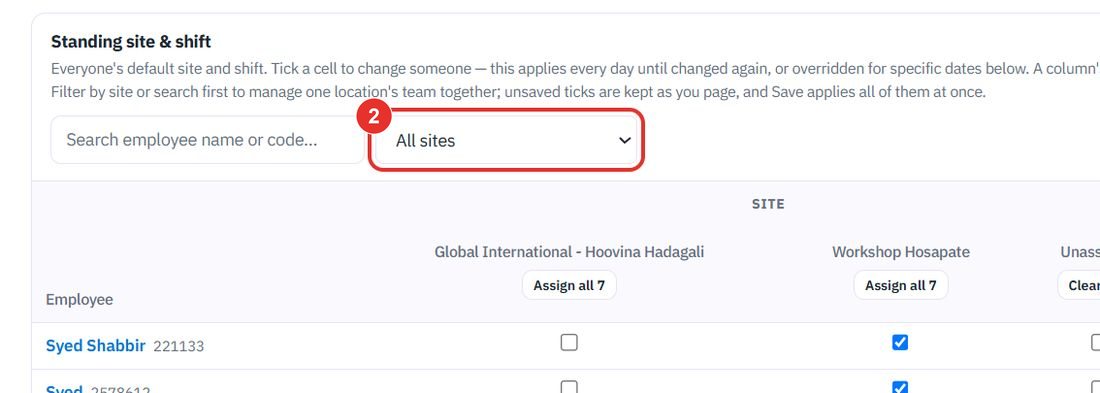
The site list above the roster table outlined and numbered 2
The search box is to the left of the site list.
3

Tick a cell in the table

Each person has one site and one shift. A tick applies every day until it is changed again, or overridden for specific dates.
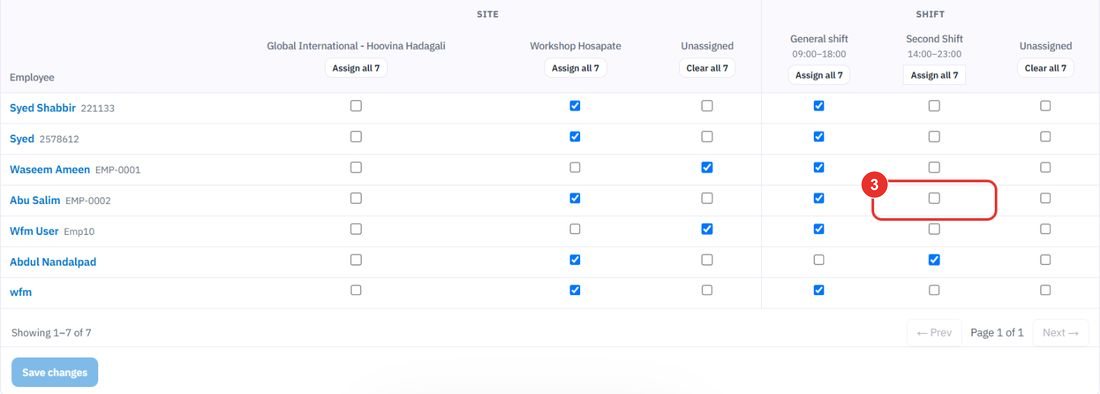
A cell in the Second Shift column outlined and numbered 3
Site columns are on the left, shift columns on the right.
4

Or click Assign all on a column

Assign all ticks the column for everyone currently filtered, not just the page you are on. Clear all removes it.
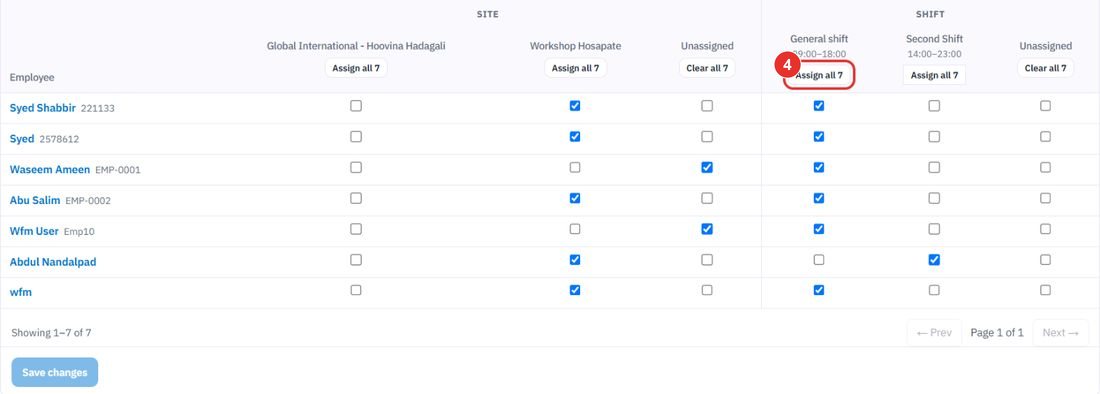
The Assign all button on the General shift column outlined and numbered 4
Each shift also shows its hours, for example 09:00–18:00.
5

Click Save changes

Ticks are kept as you page. Save changes applies all of them at once.
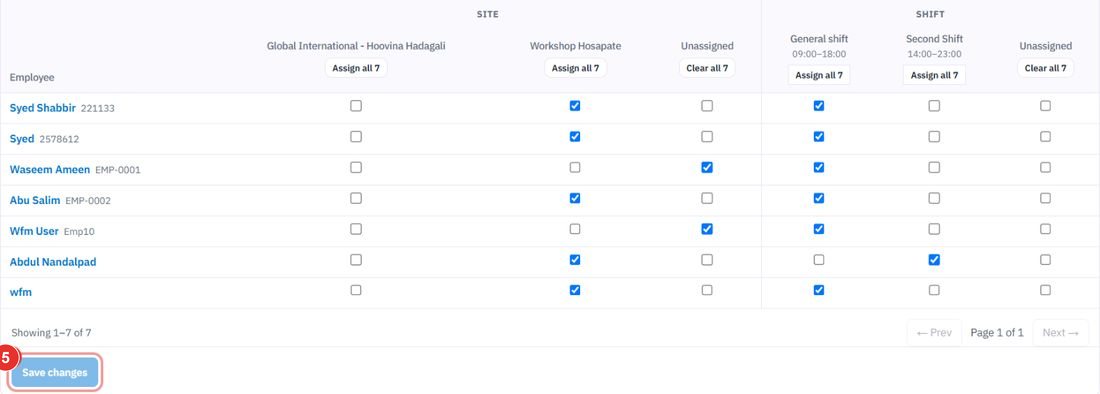
The Save changes button under the roster table outlined and numbered 5
The button is pale until you change something.

Change a shift or give a day off on certain dates

Do this for a one-off change. The standing site and shift stay as they are. For a holiday that applies to everyone, use Leave & Holidays instead.

1

Open Shift changes & days off

The list at the bottom, Upcoming — next 30 days, shows changes already made.
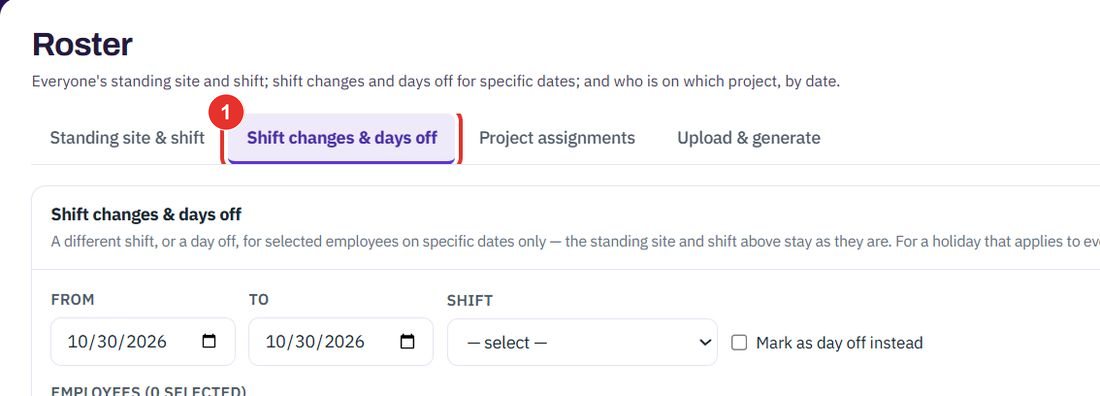
The Roster page with the Shift changes and days off tab outlined and numbered 1
This is the second tab.
2

Set From and To

Both start on today. For one day, leave them equal.
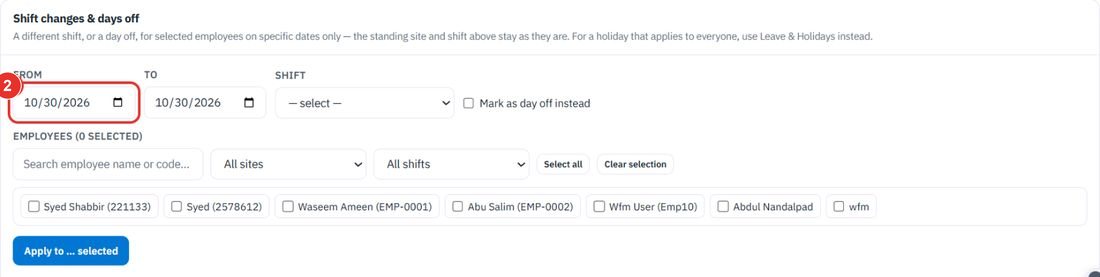
The From date field outlined and numbered 2
From and To are at the top left.
3

Choose the Shift

Pick the shift these dates should use, for example General shift (09:00–18:00).
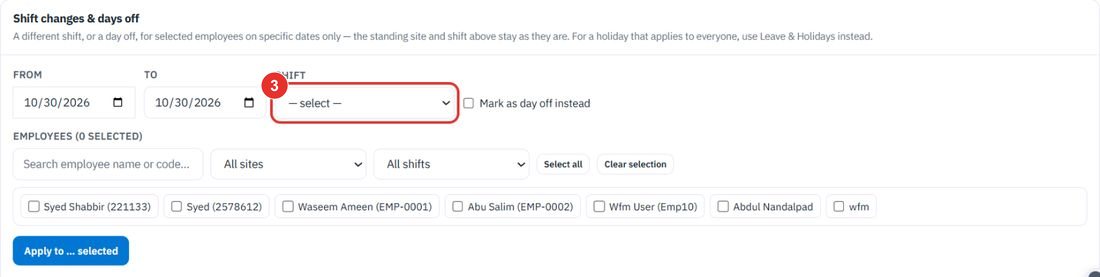
The Shift list outlined and numbered 3
Shift is next to the date fields.
4

Or tick Mark as day off instead

Use this when the person should not work on these dates.
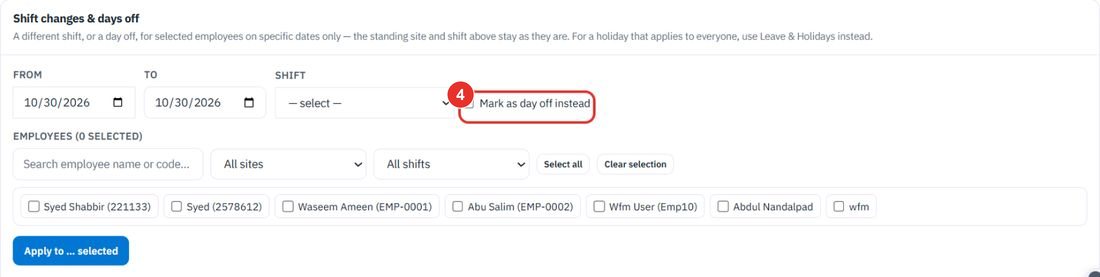
The Mark as day off instead checkbox outlined and numbered 4
The checkbox is to the right of the Shift list.
5

Choose the employees

Tick people one by one, or use Select all. The filters narrow the list by site and shift. The heading counts how many are selected.
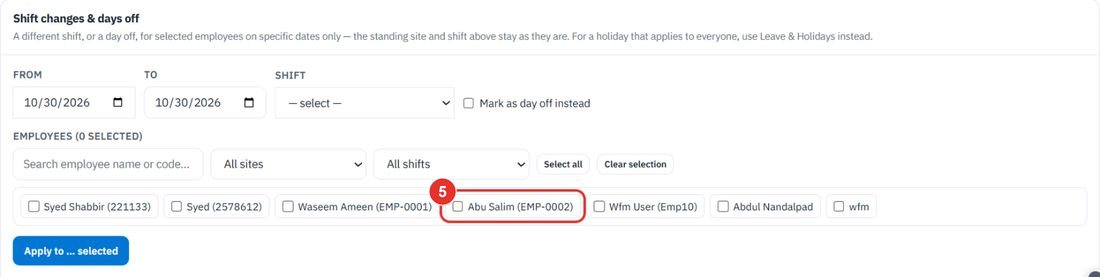
An employee checkbox in the Employees list outlined and numbered 5
Clear selection starts again.
6

Click Apply to … selected

The button shows how many people are selected. Nothing is applied until you click it.
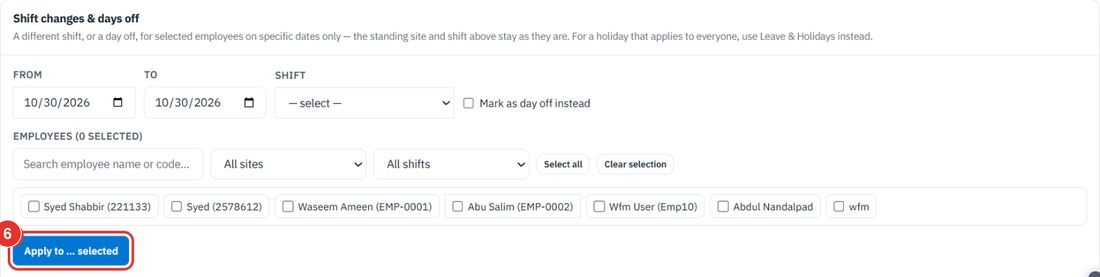
The Apply to selected button outlined and numbered 6
Changes already made are listed under Upcoming.

Put people on a project for certain dates

Do this to settle who is on what. Their shift does not change; only where the hours go.

1

Open Project assignments

On the dates you choose, this beats the project's own people, shift and site links.
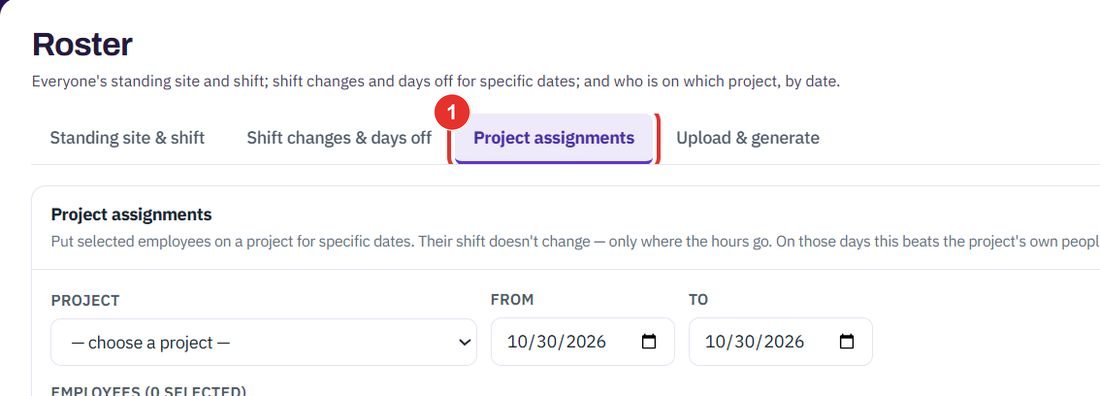
The Roster page with the Project assignments tab outlined and numbered 1
This is the third tab.
2

Choose the Project

Sub-projects are listed under their project with their level.
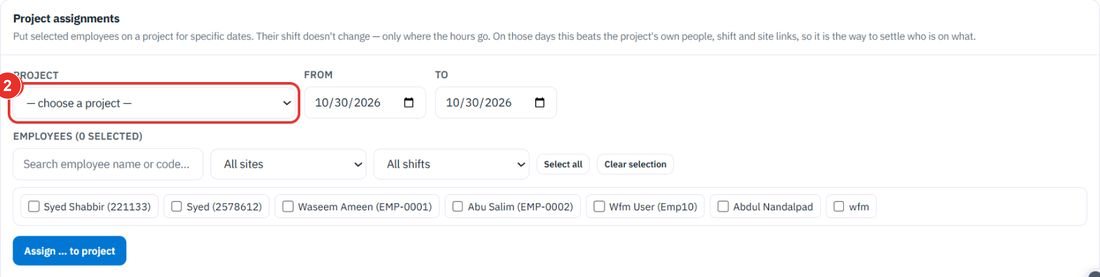
The Project list outlined and numbered 2
The list shows every project and sub-project.
3

Set From and To

The dates the people are on this project.
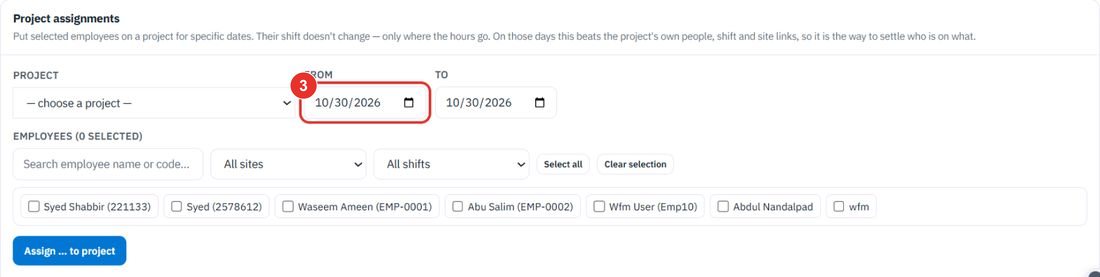
The From date field outlined and numbered 3
To is next to From.
4

Choose the employees

Tick people, or use Select all. The site and shift filters narrow the list.
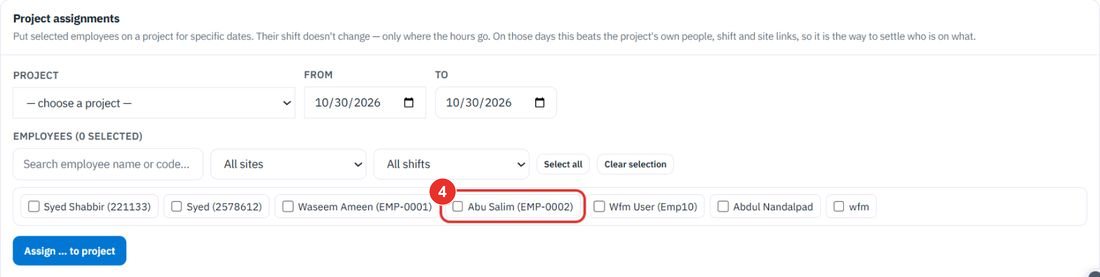
An employee checkbox outlined and numbered 4
The heading counts how many are selected.
5

Click Assign … to project

The list On a project — next 30 days below shows what is already assigned.
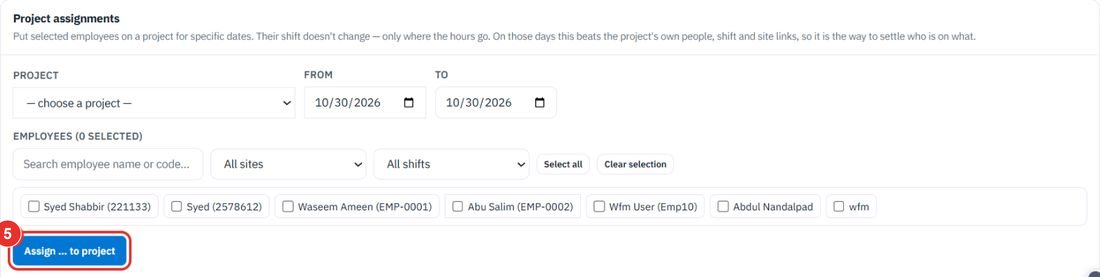
The Assign to project button outlined and numbered 5
The button shows how many people are selected.

Upload a roster spreadsheet

Do this when the roster is long or comes from another system.

1

Open Upload & generate

The page has two cards: Upload a roster spreadsheet and Alternate-Saturday roster.
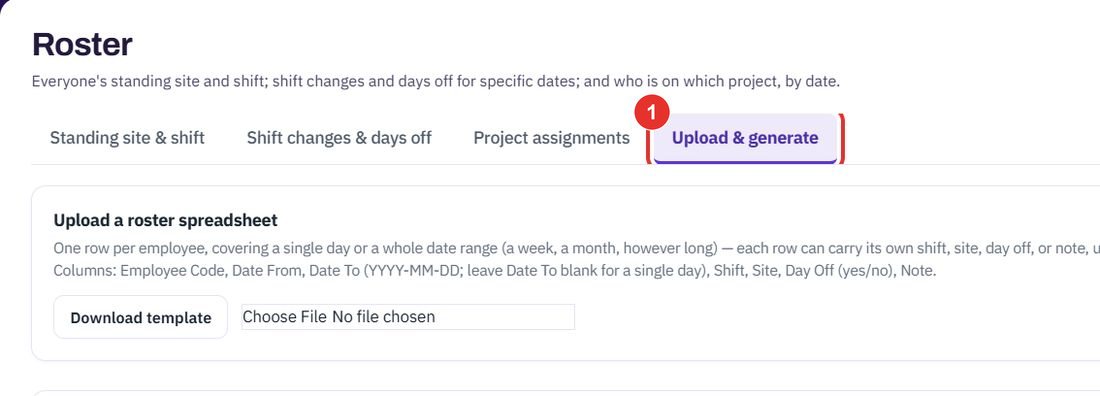
The Roster page with the Upload and generate tab outlined and numbered 1
This is the fourth tab.
2

Click Download template

One row per employee. Columns: Employee Code, Date From, Date To (YYYY-MM-DD, empty for a single day), Shift, Site, Day Off (yes/no), Note. This guide does not download the file.
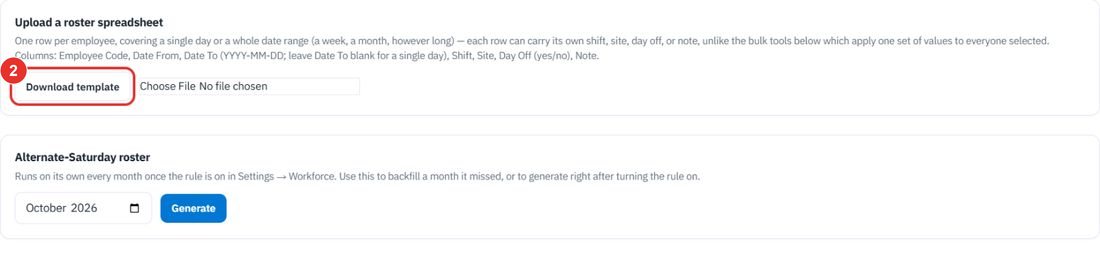
The Download template button outlined and numbered 2
Each row can carry its own shift, site, day off or note.
3

Choose your file

Click Choose File and pick the filled-in spreadsheet.
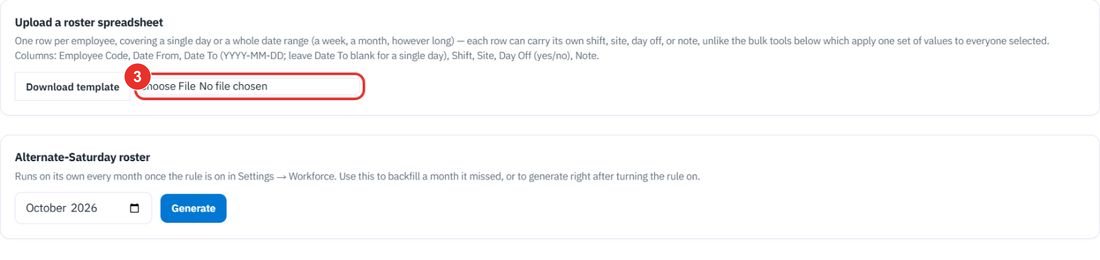
The Choose File control outlined and numbered 3
The upload card is at the top.
4

Pick the month for the alternate-Saturday roster

This roster runs on its own every month once the rule is switched on in Settings → Workforce.
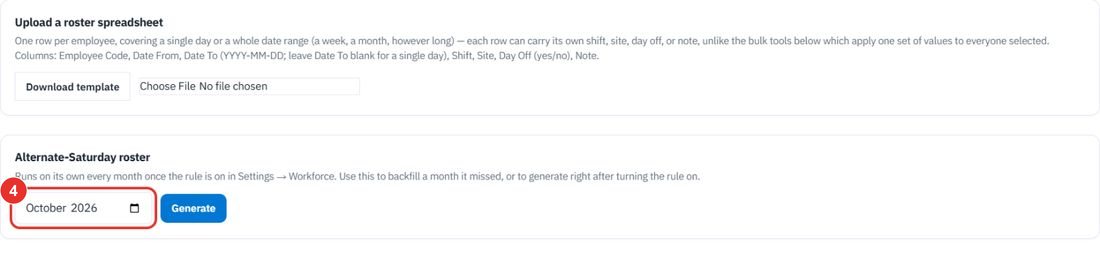
The month field outlined and numbered 4
Use it to backfill a month that was missed.
5

Click Generate

Generate builds the roster for that month. This guide does not click it.
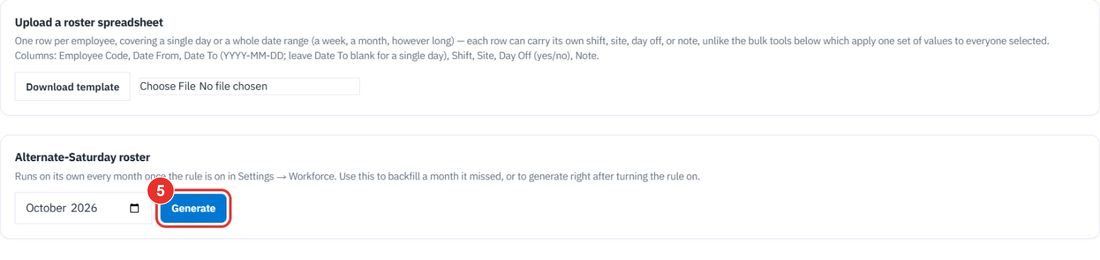
The Generate button outlined and numbered 5
Generate is next to the month field.

See it on your own data.

Twenty minutes on a live workspace, with your files and your team.